Adult Pattern: Kitsch Bitsch
Adjustments and alterations: Both patterns use basically the same method to put the hats together, with a couple of small exceptions. The toddler hat has two pieces each for the side and brim, which you are to cut out and then tape together. The Kitsch hat simply has you cut that piece on the fold, so you only need one half. If (like me) you're always looking to save paper and ink, then only print the crown and one each of the side and brim pieces, and then cut them on the fold.
Toddler Hat
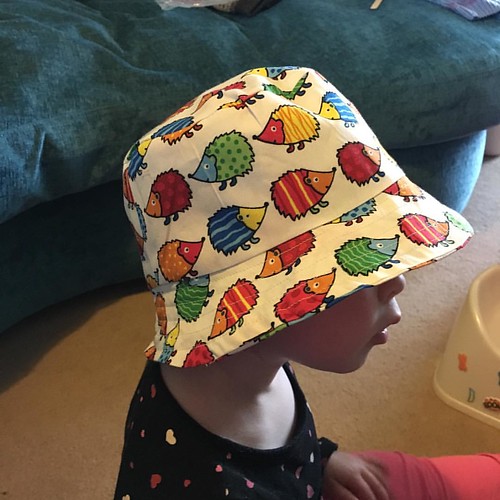
I've made this hat for my little girl before. Last summer I found some cute dinosaur fabric, and I couldn't resist making her some hats from it. This summer I bought some hedgehog fabric (which is meant to be a bean-bag!) and when I decided that she needed a hat, I knew I wanted to use this fabric. It's pretty firm, so I didn't interface any of it. I basically followed the directions from the Kitsch hat to put the pieces together, still trimming the seam allowances to ¼" after sewing. I still top-stitched around the crown, and I did some top-stitching on the brim too.
Viola! A cute hedgehog bucket hat!

Verdict (Toddler hat):
It's really cute! Because I'd accidentally printed at 106% I've made the smallest size. It worked well for my 22 month old. It's probably not really reversible though, because I cut out the inside pieces upside-down!
Adult Hat
I had some denim left over from the jacket I've been making, and I need a hat for my holiday, so I thought I'd have a go at making myself a bucket hat. I love the way they look, but they never fit me especially well. To get a good fit, I made the "inside" hat first. That way I could make adjustments to the size of everything one the easier-to-sew cotton. Because the denim is pretty firm, I decided not to interface the brim.
Once I'd stitched the hats together, and turned them the right way in, I did a little more stitching on the adult hat than called for. I did one line of top-stitching around the crown, to help keep the two parts together, and one round of top stitching on the brim.
Despite trying on the lining, and even at the time thinking "hm, this seems a little roomy", when I tried the hat on it was too big.

So, I took it apart and re-made it. If I'd had more of the denim, I'd have considered just starting fresh. The main thing I did was switch to the smaller pattern size. I also reduced the height of the sides by about ½". I didn't top-stitch around the crown this time, but I did several concentric rows of stitching on the brim which gives it a bit more firmness.

Viola! a reversible bucket hat for my holiday!
Verdict (Adult hat):
I like it. I think the pattern as written might be a little tall for my liking, but because there isn't a square to confirm my sizing, it is possible that I simply printed it too big. That would explain why the small has been the right size when I thought it would be too small.


No comments:
Post a Comment